

Why is Consent Mode v2 crucial?
- In short, without Consent Mode v2, some features in Google Analytics 4 and Google Ads might not work correctly for you. Remarketing audiences and others might not be created. Today, this also applies to other tools like Sklik or Microsoft Clarity.
- What Consent Mode v2 brings: Necessary parameters like
ad_storage,analytics_storage,functionality_storage,personalization_storage,security_storageand newly mandatory parametersad_user_dataandad_personalization. - We’ll quickly go over a method to implement CMV2 independently of the cookie banner.
Disclaimer: I’m not a specialized web analyst, so take these tips with a grain of salt as there might be inaccuracies. Plus, every situation requires an individual assessment and different approaches (speaking from experience).
Problem: Don’t rely solely on the dataLayer
- Common implementation: Cookie banners (e.g., Complianz, Cookiebot, OneTrust) send the consent status to the dataLayer (using the gtag() function or
dataLayer.push()). - Pitfalls: Latency, incorrect formatting, or as in the case of the free version of Complianz, no consent data is sent at all, making it impossible to trigger CMV2 correctly.
- Potential solution: Extracting the consent status directly from the source – from the cookie set by the cookie banner.
GTM implementation: Cookie parsing for consent status
1. Identifying and Extracting the Cookie
- First step: Find out which cookie and in what format your chosen cookie banner stores the user’s consent status (e.g.,
cc_cookie). You can find this, for example, via the Inspector (F12 shortcut) in Chrome under the Application section. - Creating a GTM variable for the Cookie (1st party Cookie):
- Select the variable type in GTM: 1st Party Cookie.
- Enter the exact cookie name (e.g.,
cc_cookie). This variable will return the entire content of the cookie.
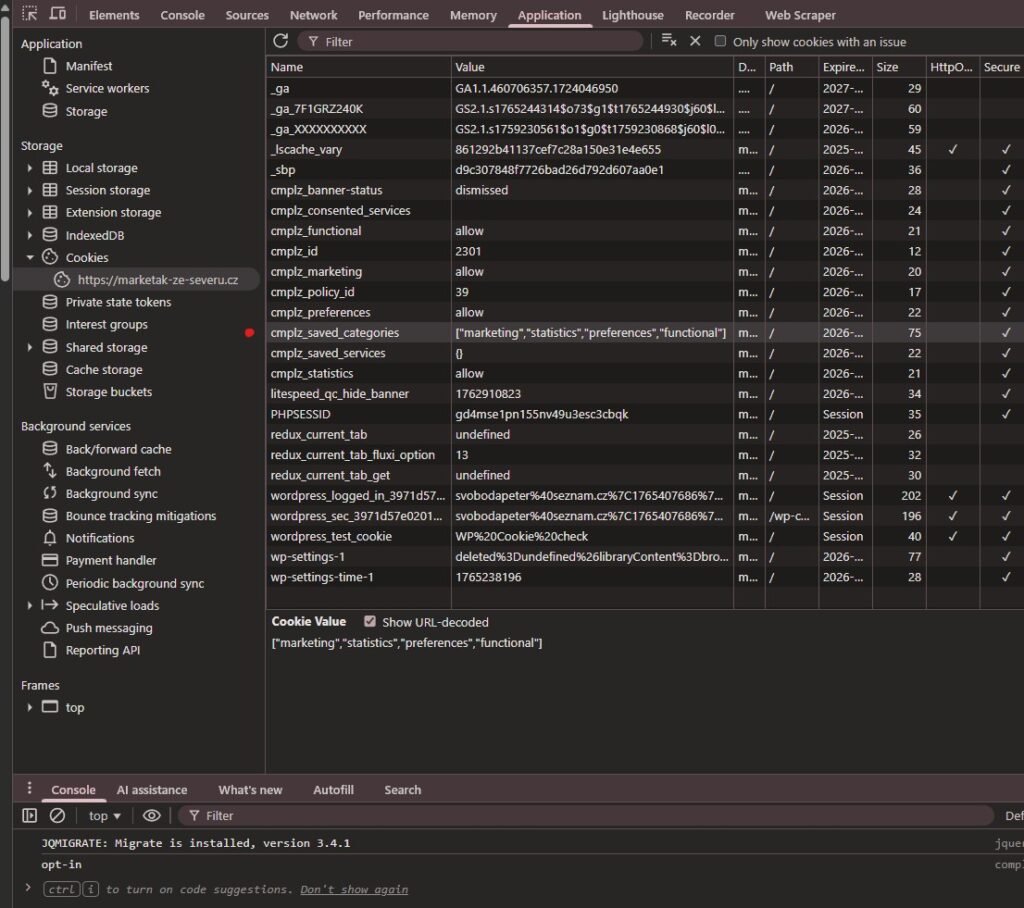
2. Parsing (Extracting) Consent Values
- Most cookie banners store data in a complex format (e.g., JSON or a delimited string).
- Creating a GTM variable for Parsing (Custom JavaScript Variable):
- This variable will contain code that:
- Gets the value from the Cookie variable created in step 1.
- Parses this string/JSON and extracts the specific status for individual categories (e.g.,
analyticsandads). - Returns the value ‘granted’ or ‘denied’ for each category.
- This variable will contain code that:
- Below is an example for the advertising category, which we can classify as ad_storage in CMV2.
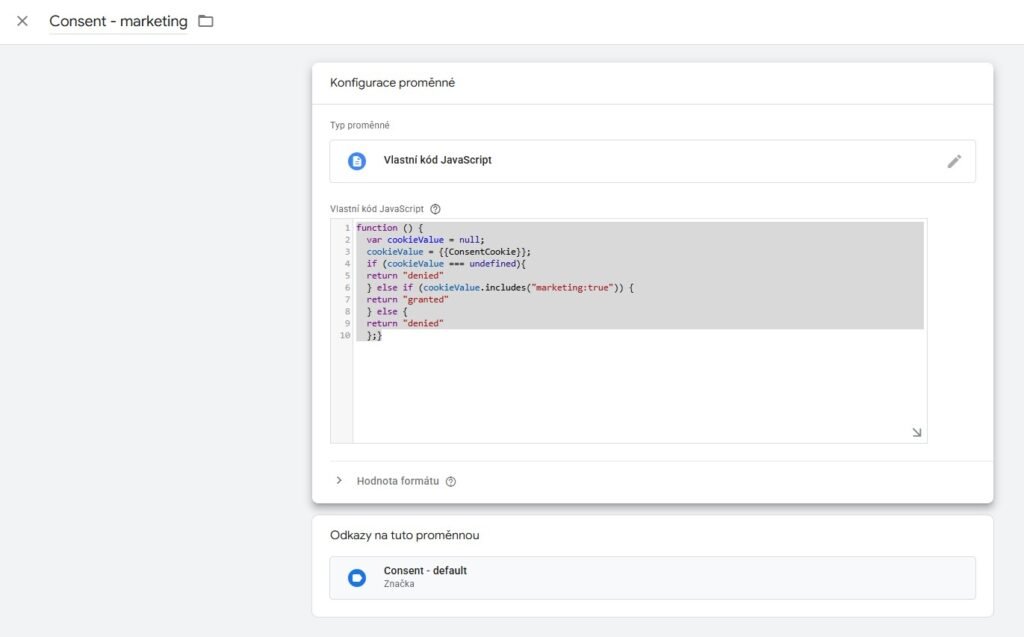
//Funkce pro extrakci stavu souhlasu uživatele s cookie lištou
function () {
  var cookieValue = null;
  cookieValue = {{ConsentCookie}};
  if (cookieValue === undefined){
  return "denied"
  } else if (cookieValue.includes("marketing:true")) {
  return "granted"
  } else {
  return "denied"
  };}
Disclaimer: Don’t let an AI chat advise you on what the code for your specific case should look like. It’ll throw errors in there because it won’t know the context of the code. 🙂
3. Mapping to the Consent Mode template by Simo Ahava
- Using Simo Ahava’s Consent Mode v2 Template: For me, this template is the standard for reliable implementation. It allows you to define the initial state (“default”) and the state after an update (“update”). Here, we’ll use the parsed values from step 2.
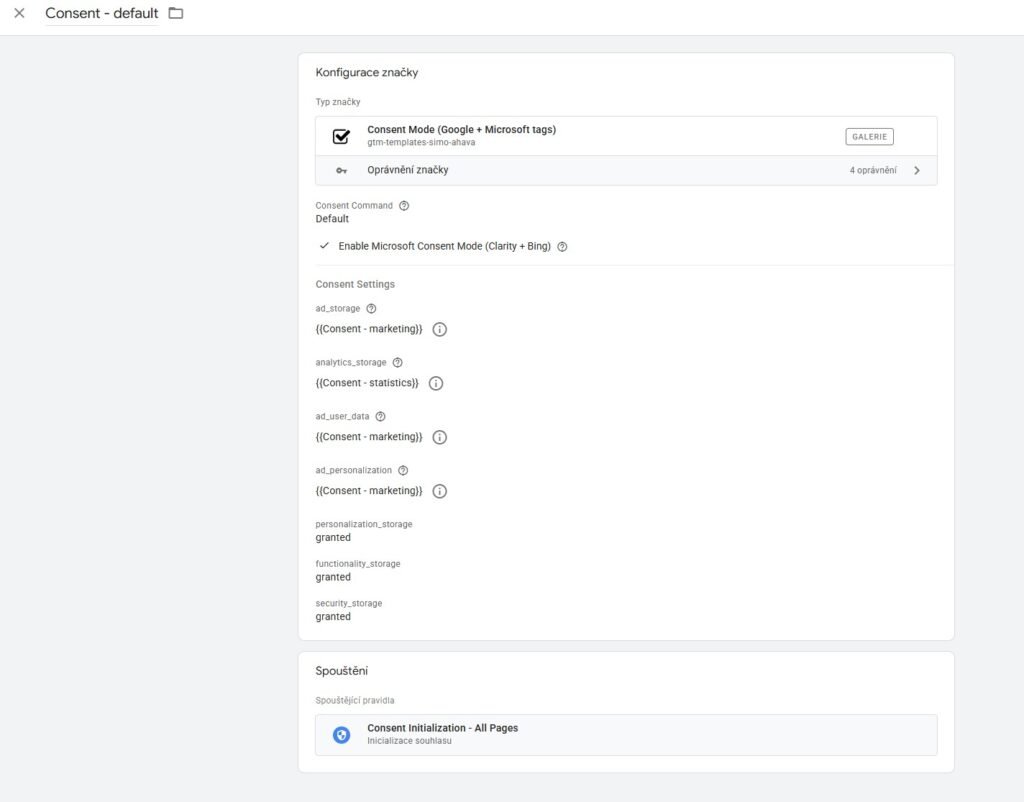
- Creating a Custom Event Trigger: We need a trigger that fires as early as possible during page load (e.g., Initialization).
4. Triggering the “Update” state for CMV2
- When to trigger the Update state: It depends on the specific case, but I usually catch the moment the user gives consent to cookies. Then I give the system 400 ms to update the cookie content from the consent banner before triggering the CMV2 “update” template.
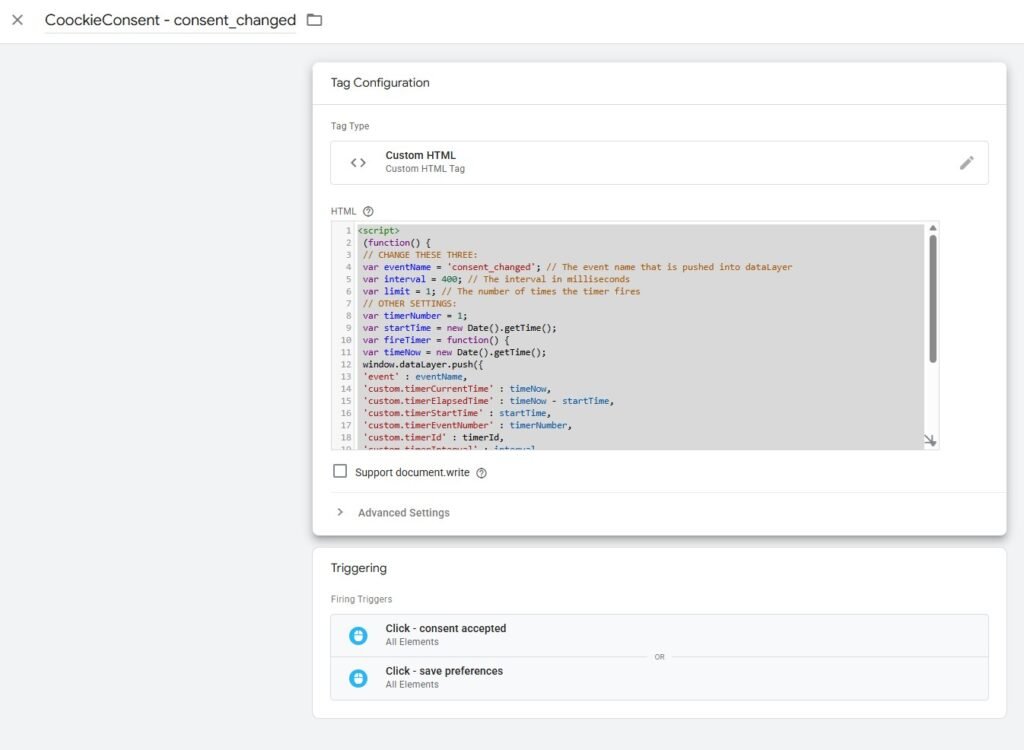
//Timer pro oddálení dalších triggerů - vytváří event "consent_changed" v datalayeru
<script>
 (function() {
 // CHANGE THESE THREE:
 var eventName = 'consent_changed'; // The event name that is pushed into dataLayer
 var interval = 400; // The interval in milliseconds
 var limit = 1; // The number of times the timer fires
 // OTHER SETTINGS:
 var timerNumber = 1;
 var startTime = new Date().getTime();
 var fireTimer = function() {
 var timeNow = new Date().getTime();
 window.dataLayer.push({
 'event' : eventName,
 'custom.timerCurrentTime' : timeNow,
 'custom.timerElapsedTime' : timeNow - startTime,
 'custom.timerStartTime' : startTime,
 'custom.timerEventNumber' : timerNumber,
 'custom.timerId' : timerId,
 'custom.timerInterval' : interval,
 'custom.timerLimit' : limit
 });
 timerNumber += 1;
 if (limit < timerNumber) {
 window.clearInterval(timerId);
 }
 };
 var timerId = window.setInterval(fireTimer, interval);
 })();
</script>- After the timer expires, I trigger the “Update” on the “consent_changed” event. For this same event, I also re-trigger the Sklik RTG code and other codes that might have been blocked the first time or sent with a different consent signal.
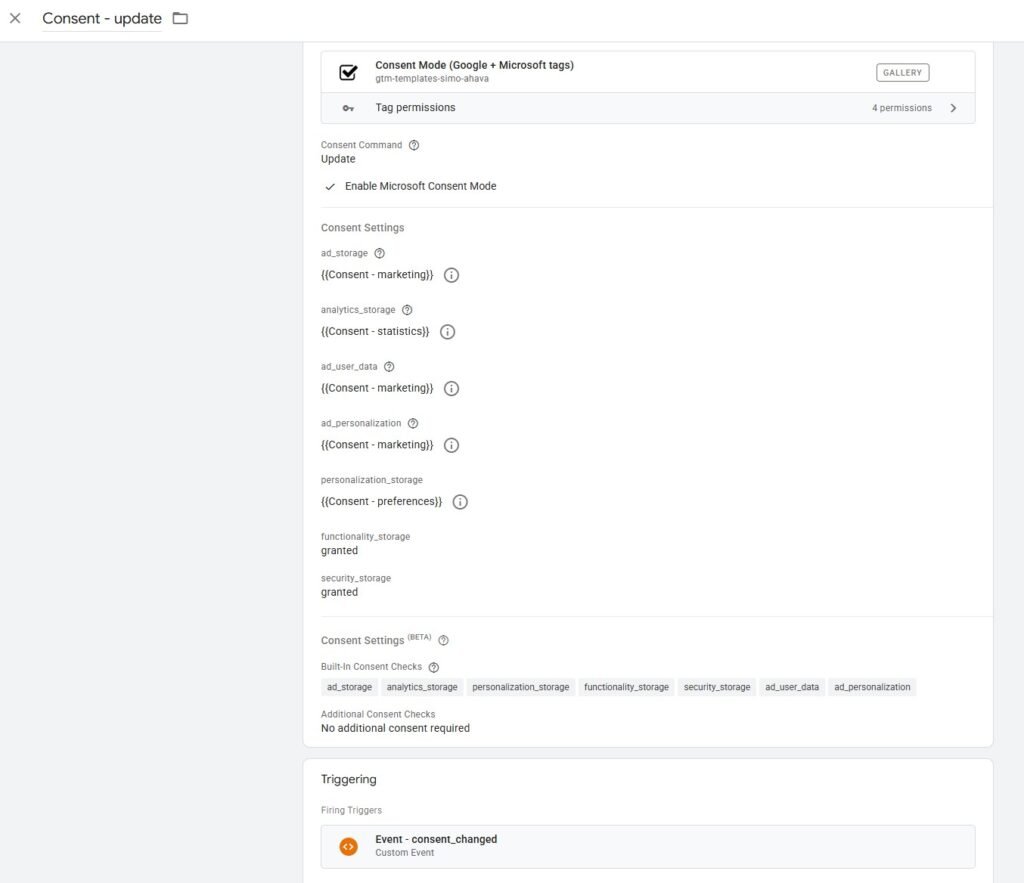
Advantage: By reading and parsing the cookie directly, we inform GTM about the consent status immediately as soon as the cookie is available, which is faster than waiting for an asynchronous dataLayer.push() from the cookie banner. This ensures maximum reliability for both “Default” and “Update” states.
Disadvantage: If you update the cookie banner, you must test and verify that neither the name nor the structure of the cookie you’re pulling data from has changed.
Conclusion: Reliability and Speed for PPC Optimization
- This method provides higher reliability when collecting signals for Consent Mode v2.
- Impact on PPC: Reliable Consent Mode v2 ensures that Google Ads has enough data for Conversion Modeling and effective bidding strategy optimization even if the user doesn’t consent to all cookies.
- Recommendation: Always test the implementation using GTM Preview Mode and Google Tag Assistant in your browser to verify that the consent status switches correctly (from
deniedtogranted) immediately after interacting with the cookie banner.